
Take a second to consider how much sensitive information you have stored on your computer at this moment. Bank information? Family photos? Financial documents?
As secure as your files feel on your PC, they’re also prime targets for malicious intent. Password protecting your sensitive folders is a basic security step. Think of it as a virtual vault, which encrypts whatever files or additional folders you’d need kept safe.
Read on to learn how to create a password-protected folder to keep your precious files protected, and sneaky onlookers at bay.
Method 1: Text-Based Folder Lock
While Windows 10 doesn’t allow users to password protect folders by default, you can use a batch script to lock folders using a password of your choice. If you aren’t familiar with batch scripts, here’s a primer.
Start by navigating to the folder you’d like to lock. I’ll create a new folder to use as a virtual safe named Safe.
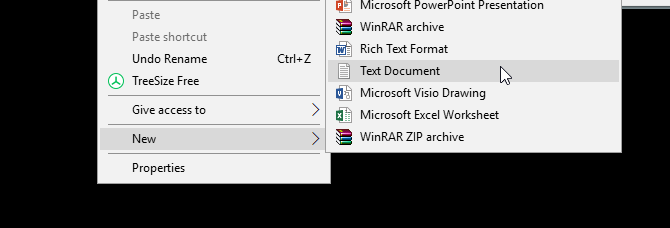
Double-click the folder. You’ll be creating your batch file within the directory that’ll store your locked folder. Create an empty text document within your folder by right-clicking an empty space and selecting New > Text Document.
Within this document, copy and paste the following code:
cls

@ECHO OFF

title Folder Locker

if EXIST "Control Panel.{21EC2020-3AEA-1069-A2DD-08002B30309D}" goto UNLOCK

if NOT EXIST Locker goto MDLOCKER

:CONFIRM

echo Are you sure u want to Lock the folder(Y/N)

set/p "cho=>"

if %cho%==Y goto LOCK

if %cho%==y goto LOCK

if %cho%==n goto END

if %cho%==N goto END

echo Invalid choice.

goto CONFIRM

:LOCK

ren Locker "Control Panel.{21EC2020-3AEA-1069-A2DD-08002B30309D}"

attrib +h +s "Control Panel.{21EC2020-3AEA-1069-A2DD-08002B30309D}"

echo Folder locked

goto End

:UNLOCK

echo Enter password to Unlock folder

set/p "pass=>"

if NOT %pass%==your_password goto FAIL

attrib -h -s "Control Panel.{21EC2020-3AEA-1069-A2DD-08002B30309D}"

ren "Control Panel.{21EC2020-3AEA-1069-A2DD-08002B30309D}" Locker

echo Folder Unlocked successfully

goto End

:FAIL

echo Invalid password

goto end

:MDLOCKER

md Locker

echo Locker created successfully

goto End

:End
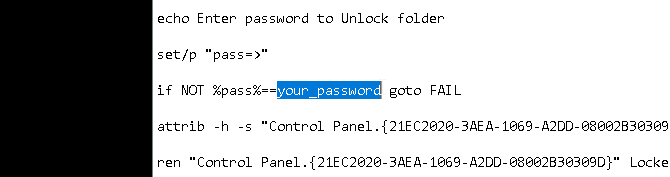
To set your password, change the your_password bit in the line if NOT “%pass%==your_password” goto FAIL to a password of your choice:
Once you’ve added your password, head to File > Save As within your Notepad program. Name it anything you’d like, Locker in my case, but ensure you add a .bat extension to your file. In my case, I will name my file Locker.bat (ensuring I’ve included the extension).
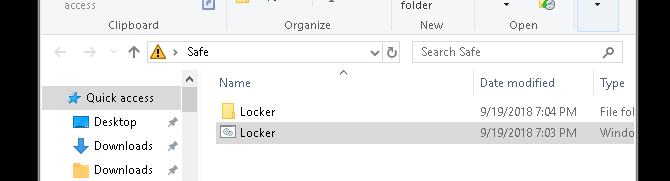
Double-click the BAT file to create your Locker folder. This is the folder that will be locked with your password. You should now have a folder and a file named Locker.
Place all your sensitive documents within this Locker folder. Once you’ve placed your files, double-click your Locker.bat file again. A command prompt will open asking if you want to lock your folder. Input Y and press Enter.
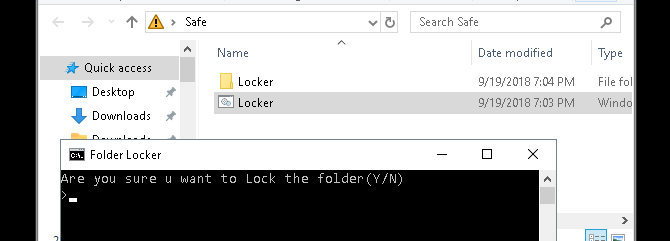
Poof! Your folder should disappear. This is a natural byproduct of your BAT file.
To access your files again, double-click on your Locker.bat file. You will be prompted to enter the password you added when creating the file.
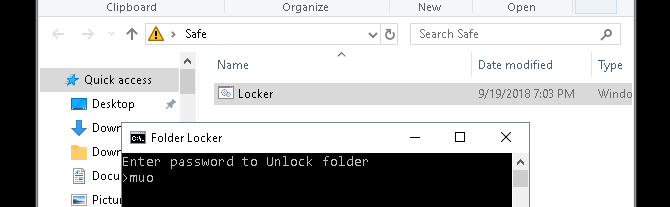
Voila! If you enter your password correctly, your Locker folder will reappear again.
Note: This BAT file can be changed via your PC. That means others who are familiar with this trick may be able to change your password. For the most part, however, this nifty little trick will add a much needed buffer to your most sensitive local documents!
If you’d like to learn more about what BAT files can do, we’ve got you covered.
Method 2: ZIP Folder Lock
While the above trick uses the default Notepad program, you can also both lock and condense your sensitive documents using a popular desktop program named 7-Zip.
Typically used to unzip folders and extract files, 7-Zip also allows users to password protect their folders. To follow this method, first download 7-Zip.
Once 7-Zip is downloaded and installed, click the start menu and type 7zip. Select the 7-Zip File Manager option. Then, locate the file or folder you want to protect, click on it, and click the Add option at the top of the window.
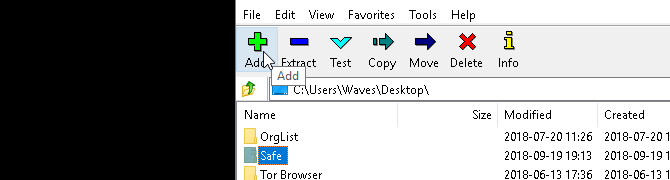
Next, enter your new password in the Encryption section. When you’re done, click OK. Check your folder location and you’ll find a ZIP file named the same as your original folder.

Now that you have your zipped file, delete your original folder (as keeping it would defeat the purpose of password protecting your new ZIP file).
It’s a good idea to create another containing folder for your zipped file, as unzipping it may scatter your files in a directory. In the example below, the Sensitive Documents folder will hold my zipped Safe file.
Right-click your zip file and select 7-Zip > Extract Here. You’ll be prompted to enter your password.
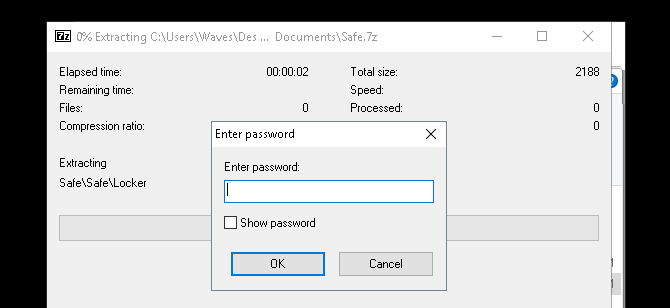
Enter your password and your files will appear in your directory.
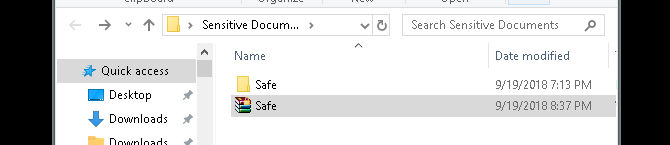
That’s it! While this method isn’t exactly timely, since you have to undergo the whole process every time you need to add or view your files, it works perfectly and only uses this trusted software.
Method 3: Hide Files and Folders
Now that you’ve locked your folder, you can also take the additional step of hiding your folder from view.
Right-click a file or folder or your choice and select Properties. Check the Hidden option beside Attributes. Click Apply and then OK.
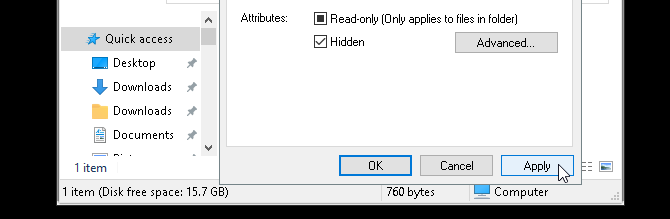
Your file or folder should now disappear. To view your folder again, click on the View tab of your Windows 10 file manager. Then, select Options > Change folder and search options.
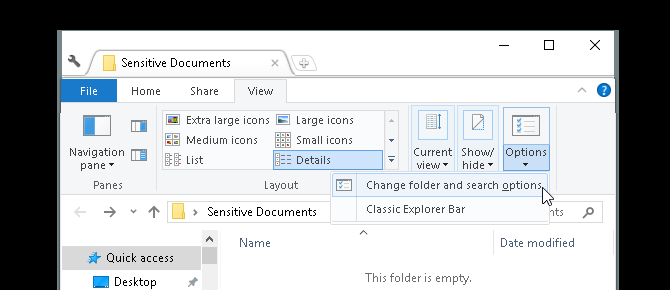
In the following File Options window, click on the View tab. Finally, click on the option labeled Show hidden files, folders, and drives under Hidden files and folders. Click Apply and then OK.
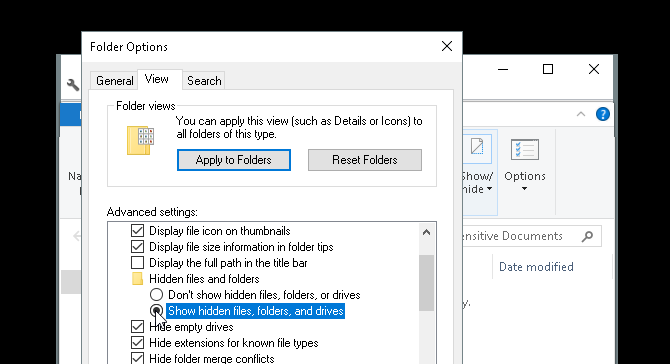
You should now be able to view your file or folder. To revert your file or folder back to hidden, head to your File Options window again and select Don’t show hidden files, folders, or drives. That’s it!
Lock Your Windows Folders to Keep Your Data Safe
With the simple methods above, you can choose to implement either one or all three. No matter which you pick, you can rest assured that your previous sensitive documents are safe under an additional layer of protection not enabled by default on your PC.
Sometimes, all it takes is a password lock to prevent theft. That applies to the virtual world as much it does to the real world. And it’s up to you to bulletproof your PC with the best security tools for your computer.
Read the full article: How to Password Protect a Folder in Windows
Comments
Post a Comment