The post How to Get Started With Windows 10 Sticky Notes in Under 5 Minutes appeared first on BardTech.

Notetaking matters. For projects big and small, taking notes is absolutely crucial. With so many note-taking apps on the market, how does one decide which to pick? When in doubt, go to the defaults.
There are plenty of default Windows 10 applications that are unfortunately underutilized, and Sticky Notes is one of them.
Sticky Notes in Windows 10
To find the application in Windows 10, click on your start button and type in sticky notes. Select the Sticky Notes option.

Right-click the entry in your start menu and select Pin to taskbar so you can open the program directly from your desktop. If you can’t find sticky notes on your PC, download it for free via the Microsoft Store.
To create a new note using your now pinned icon, right-click your Sticky Notes taskbar icon and select Add Note.

Notes can also be added using the Ink Workspace . Click on the Workspace icon and select Sticky Notes to get started.

I personally prefer this method, as the workspace provides a sleek dark background so you can manage, position, and edit all your Notes.
If you like to have a clean desktop, or don’t want your notes to muddy your desktop theme , you can also create a completely separate sticky note desktop!
To view, press Windows key + Tab on your keyboard to open the Windows 10 Task View. Then, click on the New desktop option at the top of your screen.

If you place your notes in this Desktop, they will not show up in the others. When you’re done, open the Task View again and select your initial Desktop.
Taking Notes With Sticky Notes
While its simple interface may imply a featureless app, Sticky Notes is packed with the perfect features to ease your note-taking.
First, write whatever you’d like on your note. You can use several keyboard shortcuts to organize your text, including bullets points and italicizing.

The five type keyboard shortcuts exhibited above are the main default options you can use with the latest version of Sticky Notes (2.0.18.0).
- Bold: Ctrl + B
- Underline: Ctrl + U
- Italics: Ctrl + I
- Strikethrough: Ctrl + T
- Bullet: Ctrl + Shift + L
Previous versions allowed for even more keyboard functionality but were limited to make way for Cortana integration.
Click on your sticky note and a vibrant menu row will appear.

Click on the + icon on the left to create a new sticky note. It will appear beside your initial note. Resize your note by clicking and dragging the edge of the note.
You can also stack your notes, saving precious desktop space.
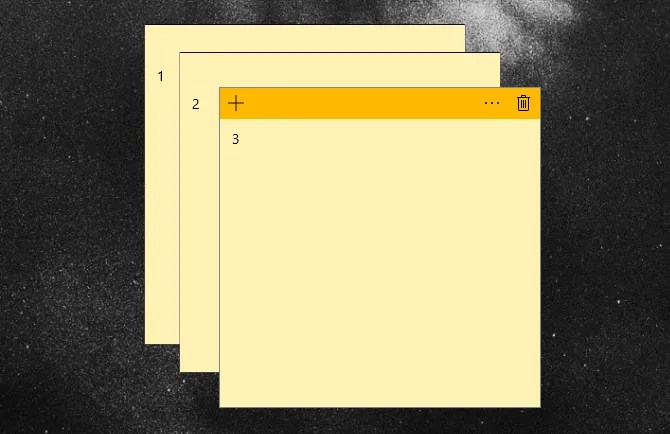
Click on the options icon (three dots) on the right to change the color of your note.

Additionally, Sticky Notes now allows for touchscreen and drawing tablet capabilities.
Feel free to draw or sketch on your note as you would on regular paper using your touchscreen or tablet.

Finally, click on the cog icon within your options menu to open Sticky Note’s Settings window. Click on the Enable insights option in this window to enable Insights within Sticky Notes.

Enabling insights integrates Sticky Notes with Cortana , allowing for a variety of useful features like planning events or checking stock directly from your notes.
Integrating Sticky Notes With Other Apps
Insights allow Sticky Notes to merge with various tools available in Windows 10.
Reminder
Below is a simple reminder typed into a note with Insights enabled.

The date will become a link automatically. Click on the link to activate Insights. You will be prompted to Add Reminder on the bottom of your note.
Keep in mind, Insights is activated via Cortana. To activate Insights capabilities, you’ll have to enable Cortana notifications on your desktop. If you haven’t set up Cortana on your Windows 10 desktop , we’ve got you covered!
Click on Add Reminder to set up your reminder in the start menu.

This also works if you write the reminder as well. However, you cannot add text to notes you’ve already written on.

After you’ve entered your date and time, click Remind at the bottom of your start menu. That’s it!
Other Sticky Notes Integrations
That’s not it for Insights. Sticky Notes also allows you to access information, via Insights, regarding things like stock and flight numbers directly from the note.

From top left to bottom right:
- Check and preserve flight numbers by pasting your flight number (which begin with two letters followed by a sequence of numbers).
- Save and send email addresses using the native Windows 10 Email app.
- View a location by pasting the address into your note. Click on the following Bing prompt to get directions to the location as well.
- Paste a phone number into your note to call the number from your desktop via Skype (you will need Skype Credits in order to complete your call).
- Paste a link into your note to save it for later.
- Enter stock options using the $STOCK format to check its price via Bing.
To view the available options Insights provides, click on the link created and then click the following Insights prompt at the bottom of the note.

Didn’t know Sticky Notes could do all of this, did you? Now you do!
Transferring Sticky Notes
While you can’t store sticky notes by default, you can transfer the file they’re saved on to other computers for later use.
First, head to the following directory.
%LocalAppData%PackagesMicrosoft.MicrosoftStickyNotes_8wekyb3d8bbweLocalState
Then, locate the file labeled plum.sqlite and copy it to a USB drive. Finally, place or replace the file within the same repository of another PC.
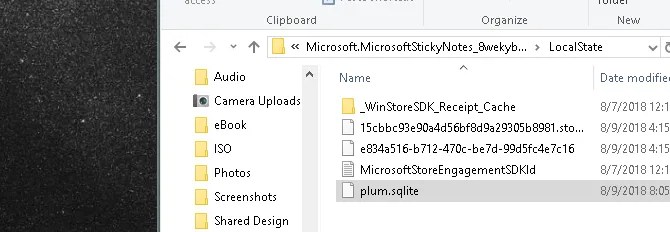
If you want to create a replacement copy of your sticky notes, create a copy of the file with an additional number—e.g. plum1.sqlite—and change your file name back if your notes disappear or become corrupted.
Need Something More Advanced? Try OneNote!
The Windows 10 store is filled with fantastic, but often underutilized, resources for users to enjoy. Sticky Notes is one such example. Best of all, Sticky Notes is one of the first apps to use Insights by default.
As Microsoft develops its Windows 10 environment, including Cortana and Insights, Sticky Note’s feature list will only grow. Looking to make that extra leap toward a cloud-based note taking? Give Microsoft’s OneNote a try!
Read the full article: How to Get Started With Windows 10 Sticky Notes in Under 5 Minutes
The post How to Get Started With Windows 10 Sticky Notes in Under 5 Minutes appeared first on BardTech.
Tags: Microsoft Cortana, Note-Taking Apps, Productivity, Windows, Windows 10, minutes, notes, started, sticky, under, windows
Original link: herevia BardTech
Comments
Post a Comment